
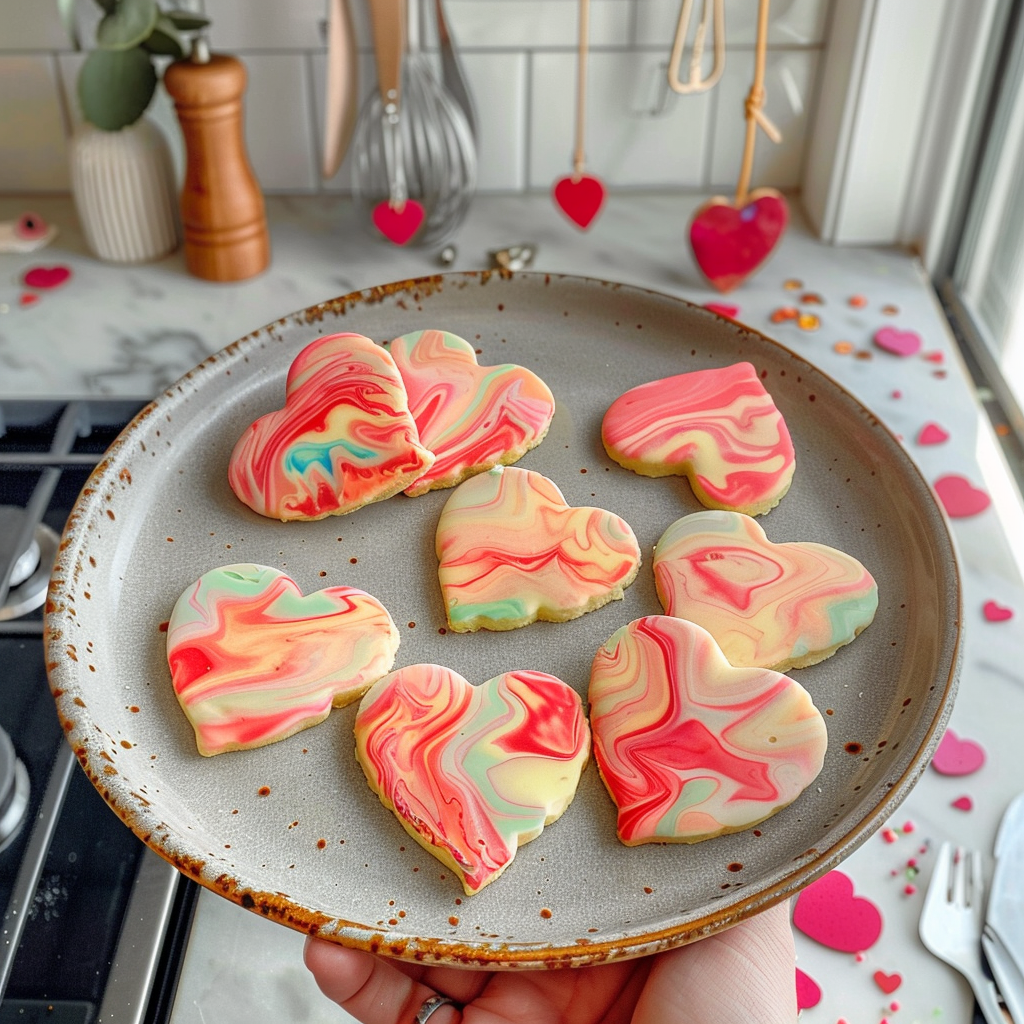
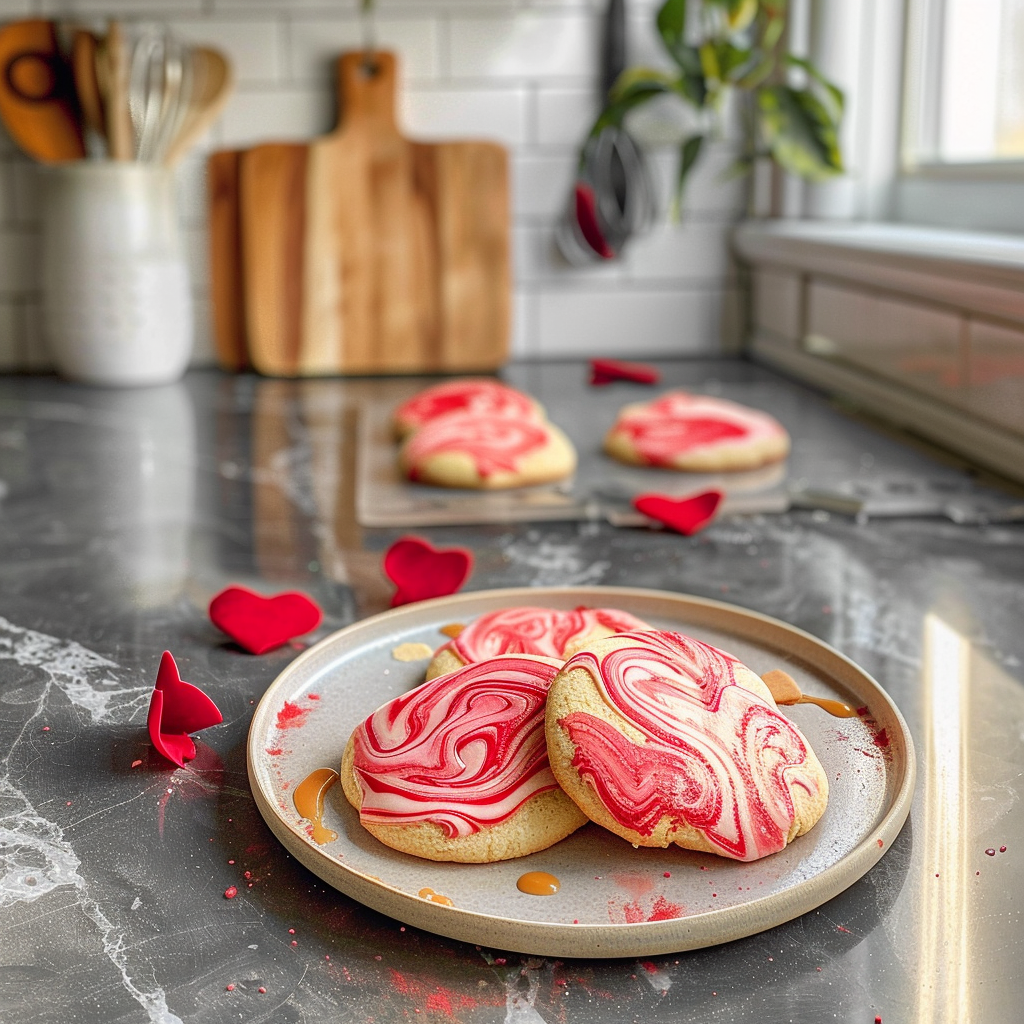
Valentine’s Day Marbled Sugar Cookies are like a warm hug on a cold day—sweet, colorful, and just the right amount of whimsical. Imagine biting into a soft, buttery cookie that melts in your mouth, with swirls of pink and white dancing together like a couple at a romantic ball. Valentine’s Rice Krispie treats Valentine’s Day cookie cups These cookies will not only make your taste buds sing but will also add a delightful splash of color to your Valentine’s Day celebration. Valentine’s hot cocoa bombs. For more inspiration, check out this Pistachio Raspberry Cheesecake recipe.
I remember the first time I attempted these cookies; it was an epic baking adventure that involved flour flying everywhere and my dog trying to sneak in for some ‘taste testing.’ But when those beauties came out of the oven, adorned with their marbled patterns, I knew they were going to be a hit at our family get-together. Perfect for sharing with loved ones or indulging yourself while binge-watching rom-coms, these cookies promise to elevate any occasion! For more inspiration, check out this Pumpkin Cupcakes Recipe recipe.
Why You'll Love This Recipe
- These Valentine’s Day Marbled Sugar Cookies are simple to make and perfect for beginners
- Their vibrant colors and sweet aroma will impress everyone
- Enjoy their buttery flavor combined with the fun marbling effect!
- Ideal for gifting or enjoying as a cozy treat at home
Sharing these cookies with friends brought smiles all around; one bite had them asking for the recipe!
Essential Ingredients
Here’s what you’ll need to make this delicious dish:
-
All-Purpose Flour: Choose high-quality flour for consistent results; it forms the base of our cookie dough.
-
Sugar: Granulated sugar adds sweetness and helps achieve that delightful crispness on the edges.
-
Butter: Use unsalted butter for better control over saltiness; cream it for fluffy cookies.
-
Eggs: Large eggs bind everything together and add moisture; don’t forget to bring them to room temperature.
-
Baking Powder: This leavening agent makes the cookies puffy and tender; it’s essential for that perfect texture.
-
Vanilla Extract: Use pure vanilla extract for an aromatic boost; it elevates the flavor profile significantly.
-
Food Coloring: Gel food coloring works best; it gives vibrant hues without altering the dough’s consistency.
The full ingredients list, including measurements, is provided in the recipe card directly below.
Let’s Make it Together
Preheat your oven to 350°F (175°C). Line two baking sheets with parchment paper to prevent sticking. This task is as easy as pie—just pop those sheets on!
Make Your Dough: In a large bowl, cream together softened butter and granulated sugar until light and fluffy. You’ll know it’s ready when you can’t resist tasting it—don’t worry, I won’t tell anyone!
Add Eggs & Vanilla: Beat in eggs one at a time along with vanilla extract. The mixture should look smooth and glossy, like your best friend after they get a fresh haircut.
Combine Dry Ingredients: In another bowl, whisk together flour and baking powder. Gradually add this dry mix to your creamed mixture, stirring until just combined. Avoid overmixing—think gentle folds rather than an enthusiastic wrestling match.
Create Your Colors: Divide dough into two bowls. Add food coloring to one bowl until you achieve your desired shade of pink—think rosy cheeks or cotton candy skies.
Marble Your Dough: Scoop both colors onto a lightly floured surface. Gently press them together before folding them slightly—this creates that beautiful marbling effect that will have everyone swooning!
Shape & Bake Cookies: Roll tablespoon-sized balls of dough and place them on prepared baking sheets about two inches apart. Bake in preheated oven for 10-12 minutes until edges are just golden. Keep an eye on them—they bake fast!
Now sit back and let those heavenly scents fill your kitchen while you try not to eat all the dough beforehand!
Once baked, allow the cookies to cool on wire racks before indulging or decorating with sprinkles if you’re feeling extra festive! Enjoy every moment as they disappear faster than you can say “Valentine’s Day Marbled Sugar Cookies.”
You Must Know
- These Valentine’s Day Marbled Sugar Cookies are not just visually stunning; they’re a delightful treat that brings joy and sweetness to any celebration
- The buttery aroma fills your kitchen, while the colorful swirls will make your heart flutter
- Perfect for gifting or sharing with loved ones!
Perfecting the Cooking Process
Start by mixing the butter and sugar until fluffy, then gradually incorporate eggs and vanilla. Following that, alternate adding flour and milk to achieve the perfect dough consistency for these delicious cookies.
Add Your Touch
Feel free to swap out vanilla extract for almond or lemon extract for a unique twist. You can also add sprinkles or chocolate chips to elevate the flavor and visual appeal of your Valentine’s Day Marbled Sugar Cookies.
Storing & Reheating
Store these cookies in an airtight container at room temperature to maintain freshness. If you need to reheat them, pop them in a microwave for a few seconds; this revives their soft texture beautifully.
Chef's Helpful Tips
- To ensure your cookies turn out perfectly, measure your flour correctly using the spoon-and-level method
- Always chill dough for at least 30 minutes before baking to promote better marbling
- Lastly, experiment with food coloring brands for vibrant hues!
Baking these cookies reminds me of Valentine’s Day celebrations as a child, crafting treats with my family and feeling the love spread through our kitchen. decadent Valentine brownies.

FAQ
Can I use margarine instead of butter?
Using margarine will affect texture but can work in a pinch if needed.
How can I achieve vibrant colors in my marbling?
Use gel food coloring for more intense shades without altering dough consistency.
What should I do if my dough is too sticky?
If sticky, chill it in the refrigerator for about 20-30 minutes before rolling out.

Valentine’s Day Marbled Sugar Cookies
- Total Time: 32 minutes
- Yield: Approximately 24 cookies 1x
Description
Valentine’s Day Marbled Sugar Cookies are the perfect sweet treat to celebrate love! With their soft, buttery texture and delightful pink and white swirls, these cookies are not only visually stunning but also incredibly easy to make. Perfect for sharing with friends or indulging while watching your favorite romantic comedies, they bring a touch of whimsy to any occasion. Bake a batch this Valentine’s Day and watch the smiles unfold!
Ingredients
- 2 ¾ cups all-purpose flour
- 1 cup granulated sugar
- 1 cup unsalted butter (softened)
- 2 large eggs (room temperature)
- 2 tsp baking powder
- 2 tsp pure vanilla extract
- Gel food coloring (pink)
Instructions
- Preheat oven to 350°F (175°C) and line two baking sheets with parchment paper.
- In a large bowl, cream together softened butter and granulated sugar until light and fluffy.
- Beat in eggs one at a time along with the vanilla extract until smooth.
- In another bowl, whisk together flour and baking powder; gradually add to the creamed mixture until just combined.
- Divide dough into two bowls; color one bowl of dough with pink gel food coloring.
- On a floured surface, scoop both colors together and gently fold them for marbling.
- Roll tablespoon-sized balls of dough; place on prepared baking sheets about two inches apart.
- Bake for 10-12 minutes until edges are lightly golden. Cool on wire racks.
- Prep Time: 20 minutes
- Cook Time: 12 minutes
- Category: Dessert
- Method: Baking
- Cuisine: American
Nutrition
- Serving Size: 1 cookie
- Calories: 150
- Sugar: 9g
- Sodium: 50mg
- Fat: 7g
- Saturated Fat: 4g
- Unsaturated Fat: 3g
- Trans Fat: 0g
- Carbohydrates: 20g
- Fiber: <1g
- Protein: <1g
- Cholesterol: 25mg

Leave a Comment